Showing posts with label stitcheries. Show all posts

sweet smell of summer - in february


The winter is still very much with us, and although it was noticeably warmer today, there is still some snow on the ground. The weather man promises temperatures above zero for the coming week, hurrah!     


In the pictures on the left is a part of my last year's lavender harvest. Some of the dry lavender is still unprocessed, and as I did not feel like stitching anything too complicated this weekend, I decided to play. I think lavender is something you love or hate. I love it, and at this time of year it is a welcome reminder of summer.
                                                                     

I wish you all a very good week!

stitches

It was when I was reading on Gudrun's blog that she has joined My Stitches blog, where they are exploring various stitches, I remembered my scroll.
I know that as an embroiderer I should be exploring and practicing various embroidery stitches, but I am not so disciplined. I tend to explore a particular stitch when I actually need it for a certain project, and only then I have a trial run on a separate piece of fabric. It also has a lot to do with how much time you have.
I few years ago I did stitch a small sampler, but what to do with it after I finished it? And how do I remember the names of the stitches?


So I photocopied the whole sampler onto a piece of paper and wrote on the names of the stitches,


and I rolled up both together into a scroll.


lost Peru

This story is a touch complicated.
As we all know, the next Summer Olympics will be held in London, in 2012.
For this occasion the Embroiderer's Guild of UK decided to stage an exhibition of wall hangings made by individual branches of the Guild.  Each wall hanging is being made from members embroidered cards, measuring 4 x 6in each, and joined together. The theme for the wall hangings are countries taking part in the Olympics and each branch of the Guild was given a country which it will represent. The embroideries themselves could be anything which we connect with that particular country.
My local branch was given Peru.

As all the wall hanging are supposed to be ready for this autumn, everyone was busy during the summer, stitching their card. My decision to joint the project was a last minute one and so was my embroidery!
One of our members kindly volunteered to take on the work of joining all our cards together.
As I did not have the time to drive over to her, I put my card in the post. This was on the 15th August.
I think you know what comes next, it did not arrive, or rather it took 3 and half weeks to get to its destination, distance of some 10 miles, via 2 sorting offices! Apparently, I did not put the correct postage on the letter!
By then I decided, for various reasons, not to renew my Guild membership this September. As I will not be a member by the time the wall hangings will go on show, my card has been returned to me. So, as it is not going to be seen anywhere else, I give you my

PERU


indian stitchery

This was the name of our Embroiderer's Guild workshop last Saturday, with lovely Tiggy Rawling.
Tiggy brought her "Indian Shop"" with her, with fabrics, felt and threads she dyes herself, and a large selection of embellishments.


We had a choice of making a cushion or a wall hanging, using cotton backing and bright fabrics, which were covered with tulle and then stitching over it, or a sampler worked on piece of felt.

This is Tiggy's tulle cushion.


First of all Tiggy showed us how to stitch on shisha mirrors, so they would not fall out. Her way is much better then I have seen in books, much more secure. It took us a while to get the hang of it, but then we were away!
I decided to make a small felt sampler. I know from the past experience, that if I get too ambitious in work shops, I will not finish the project and it will end up in a draw when I get home.
I used a piece of lovely hand dyed felt from Tiggy's shop.
This is the result.


Tiggy also brought with her various other examples of Indian embroidery to show us.


But my favourite item, the one I fell in love with, is Tiggy's blue quilt.


I promised myself to make one (sometime in the future).

In the meantime, I went home with some purchases from "Indian Shop".


Tiggy gave us a list of books we might want to look at for further information about Indian stitching, but when I got home and browsed through my books, I realized I already have a book on this subject.
It has all the basic stitches and some projects, however the technique for stitching on shisha mirrors shown here is not as good as Tiggy's.


Another lovely stitching day....

another week

After the Spring Quilt Festival last Friday, I went to a workshop with lovely Beppy Berlin on Saturday, at our Guild group. The workshop was called "Jacobean with a difference". Although Jacobean embroidery is traditionally stitched with crewel wool, Beppy introduced us to a different interpretation, using mixture of organzas, metallic threads next to cotton and silk threads, and a touch of goldwork with kid leather. She is a very good tutor and fun to be with. She always brings a lot of her work to show and inspire us. This was the first time many of us used kid leather in our stitching, so the room was filled with heavy concentration. It looks like I haven't got much to show for it, but believe me, there is a lot of work there!


I am determined to finish it!

On Tuesday we drove to Bath for our lunch! There is a new bar/restaurant opening this weekend in Bath and during this week they were opened to invited guests only. And yes, we were privileged enough to be invited.
It was a very pleasant experience, the place is very nice and airy, the staff young and friendly, the food very good. So, if you happen to be visiting Bath this year, I can recommend The Tramshed.

You might remember that I mentioned a Textile group I am a member of, and last 2 or 3 weeks we have been "playing" with pieces of dyed blankets. I must admit that I was little bit stuck for an idea, as I have done this project before. In the end, with this Sunday's "Mother's Day" in mind, this the result.


 I was without an internet connection all day yesterday (their fault, not mine), how lost did I feel? I take my computer connection so much for granted now, how did we manage before we had it? One thing I can say, I had more time! LOL.
This past week has been busy anyway, I am well behind in visiting you, lovely people, so I set down yesterday to catch up and... nothing. I must admit that it rarely happens to my internet provider. My connection very often slows down to "stand still" speed, but that is more to do with where I live, ie very rural and probably the furthest one from a telephone exchange, I know that nobody else could get me a better connection anyway. But this was the longest their server was down for.
So, I am sorry for not visiting, but I will try to catch up with you soon!

baking cover

Christmas seems to be a distant memory, despite the fact that it was only two weeks ago. The first week of the new year is behind us and we are back to our routine. I am now working a couple of days a week, partly to support my stitching addiction and partly to help to keep my brain in the right gear. With the school holidays over, for three afternoons a week we are again helping with our two grandchildren, ages 3 and 5. By the end of those days there is not much energy left over, on both sides! But we constantly see it as a great privilege to be part of their lives.

So, it was nice to start a new stitching year with a quick and easy project. In December I wrote about a pattern for baking cover from Northern Quilts, which I won on May Britt's and Hanne's giveaway.
It did not turn out to be as easy as I thought. After I traced the stitchery pattern onto my fabric and done some of my own freehand wording, I then ironed over it! Which of course meant that after I did all the stitchery, the tracing pencil would not rinse out! I did not want to try to wash it, thinking this would set it even more.
At this point I really thought that I would have to re-do the whole thing again. In the end, realizing that I can't do any more harm, I soaked it in Vanish and put it through the wash. And hurrah, it worked!

             Why is it, that the simplest things in our life sometimes turn out to be not simple at all!

                   So, this is my baking cover, being used for the first time today.


Thank you, May Britt, for helping me with the translation from Norwegian!

embellished fabric book - project6 - autumn


After a fairly mild autumn the temperature is dropping, the weather man has even mentioned the word "snow"! I hope this applies only to the north of the country...
After growing up with snowy winters of the central Europe, it took a long time for me to get used to dark and wet English winters. But now I actually prefer them, however nice it is to see the the first snow. Living in the country as we do and the management of the roads here as it is, snow usually means being stranded....It is however fun for the children, and it also means that the schools around here remain closed in such times and the children can enjoy the brief spell of snow. I just hope that we will not get the repeat of the last winter, which was also very cold, for a very long time.

The pictures here are views from our upstairs window. I love the mist above the river which is flowing through the valley.


I collected some beautiful leaves, which were blowing around our garden, a couple of weeks ago, before the rain changed them into a wet mush. They made a lovely picture. The nature produced some spectacular colours this autumn.             
The photograph gave me an idea for another project for my fabric book.


what should postman bring next?

I have been reading Jennie's blog, she has been learning "stitch and slash" technique in the course she is currently attending. I remembered that I learned this in one of the workshops I went to quite a while ago.
Jen is much more creative with her sample, it will be interesting to see it when finished.
The object of the workshop I went was to make a bag. It is one of the projects I actually finished!


I remember that our tutor brought various objects made using this technique, from cushions to a waistcoat.
Depending on fabrics used, you can get some amazing results.

I am waiting for the postman to bring me no 4 of BOM, so I can finish my Christmas tablecloth. I need one more corner to embroider plus the rest of the design. I might even finish it before Christmas!


Some of you, who have commented on the Tail Feathers quilt, wondered if they too should have a go at machine quilting. Let me say, that I don't think it is something I will take up in a big way, but I am glad I have done it and I will be confident to have a go if I need to in the future. It is very scary to start with if, like me, you haven't done any free motion embroidery before, but it gets easier. I practiced on a small Tilda stitchery before starting on the quilt, which proved to be a good idea.


tail feathers quilt

Yesterday was a perfect afternoon for it. Outside was wet and windy, but inside the fire was glowing.
So I settled down in front of TV, put on DVD (Jane Austen's Persuasion) and finished stitching the binding on the Tail Feathers quilt, at last! How better to spend an afternoon like that?
I fell in love with the quilt first time I saw a picture of it about a year ago and I knew I had to make it.
And here it is!


The quilt was originally BOM, but by the time I discovered it I had to get the whole package. This was nearly a year ago, but I did not start on it until early summer, when I took the first stitchery with me on my holiday. I enjoyed the embroidery parts of the quilt most of all. The rest of the quilt is done on the machine.
I am mainly a hand stitcher, but as this is the largest quilt I have made to date, 1.5m x 1.5 m,  I decided to machine quilt the whole thing for the fear that if I don't, it will end up another UFO. This is the first time I machine quilted anything, and I don't do machine embroidery, so please don't look too close.


Design by Natalie Lymer of Cinderberry Stitches;
Fabric: Moda, mainly Mill House Inn, purchased with the pattern from the lovely ladies at Buttonberry;
Threads: embroidery DMC threads 470,680,733,830,3328,4120, machine quilting Aurifil 2110.
Wadding: "Warm & White" cotton


UFO - korak

I am currently in the process of sorting out my room, which, I am afraid, could take some time. I have come across some UFO's, which I am sure many of you have too.
The most interesting of all my UFO's is my Korak sampler.
The first time I came across Korak, was when one of the Guild members brought in a patchwork she was working on, but I was intrigued by the method she was using to stitch what looked like a quilt top.
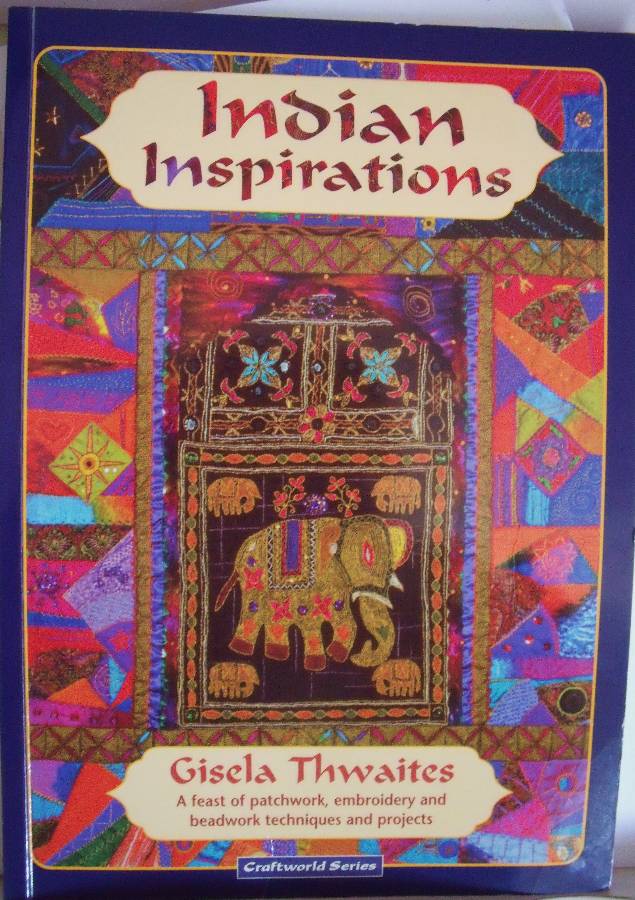
She was working from a book by a Swiss author Ruth Tschudy, which she came across on her holidays in Germany. Eventually I managed to find this book on  Amazon. It is a very interesting book, showing some old Koraks, and also some of Ruth's own work and projects to make with instructions.
The text inside the book is in both German and English.


Korak is thought to be one of the most ancient form of patchwork in the world. They were produced in the areas along the Silk Route, mainly in Afghanistan, Uzbekistan and Turkmenistan.
Koraks were used mainly as floor and wall coverings by the nomads living in the area, sometimes pressed into still soft mud walls of their new huts. Because they were made along the Silk Route, where the caravans were bringing fabrics from different parts of the world, Koraks were made with all sorts of fabrics, cottons, silks, brocade, velvet ...
Ruth Tschudy's book explains the significance of shapes and colours used, mainly the triangle.
The Koraks are stitched onto a foundation fabric like old cottons, linen etc. I used a piece of calico. A lot of work goes into the preparation, making templates and cutting out the fabric shapes.
You start with drawing a grid onto the foundation fabric, whatever design you want to stitch. Then you lay and pin on the shapes, starting at the bottom, working upwards, overlapping the raw edges as you go along.
All the stitching is done by hand, on the right side, using the straight hem stitch, again starting from the bottom, removing the pins as you sew. Koraks are not backed or quilted.
My sampler is about 40 x 36 cm. I made it only as an exercise, not really thinking ahead what I am going to do with it. Later I decided it could be made into a wall hanging, so I stared to embellish it. I think that at that point I did run out of ideas and it ended up in the draw. May be it is time to resurrect it!

this week's progress


I have taken this picture of sunset after a day of rain.


The weather is very changeable now, we have even had some night frosts. But the garden continues to flower.


 I have now finished the embroidered part of BOM no1 and nearly finished no2. I will start on the patchwork part, as soon as I decide which fabrics to use!


I have made a lot of progress with the Tail Feather quilt. All of the 24 log cabin blocks for the border are now done, as well as the 4 corner blocks.  It is all ready to be put together and the top will be done.